3D Object Tracking in a Custom Video Clip – Part I
Explore how to set up markers for custom geometry tracking so you can easily track objects in your green screen footage.
As a 3D artist, I’ve always been passionate about live-action movies. In this case, the actors are real, while the rest is almost 98% CGI. The actors perform on digital backgrounds during the video shoots, surrounded by 3D props.
If you ever watch behind-the-scenes documentaries and footage, you’ll see giant green screens with tracking markers. It’s commonplace to see flying actors supported by wires—for action sequences—and even physical assets in some parts of the shooting location.
It’s so exciting to understand these techniques applied to the film industry! Although your budget might not be comparable to that of a major studio, it’s not a big deal. You can always learn to apply the same principles by producing professional shots and executing some simple 3D techniques.
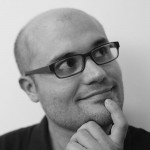
The Jungle Book by Walt Disney pictures makes the protagonist live inside a tremendous 3D environment. Because of the jungle colors, the actor playing Mowgli constantly performs in front of a blue screen and not a green. The match and the integration are fantastic.
The technique involved is called camera tracking. When the camera moves, the static 3D elements must maintain their location as if they were part of the actual video shoot.
You can find a series of episodes I wrote at the following links:
- How to Integrate 3D Elements into Video Footage – Part I
- How to Integrate 3D Elements into Video Footage – Part II
- How to Integrate 3D Elements into Video Footage – Part III
Sometimes we could also want to focus on a specific object in the video and track its movement.
Imagine the following example where a pair of 3D arms follows the actor’s arm movement by overlapping them during the sequence. As a result, we could add a digital scar on the character’s arm, for instance.
Make your Video Shoot with the Right Equipment
The point of this article is to show you how everyone can take advantage of affordable tools to record a short live-action sequence with CGI elements. Depending on your budget, you can do that, from a modest cost of $250 to thousands of dollars.
This is just the first part of the two-part series. We’ll get through the preliminary steps in this issue to set up a real shot with 3D object tracking. In the next installment, we’ll conclude our current scene that we need to complete with lighting, rendering, compositing, and other professional tips while working with your 3D software.
Before getting straight to the shot, let’s see what equipment we need.
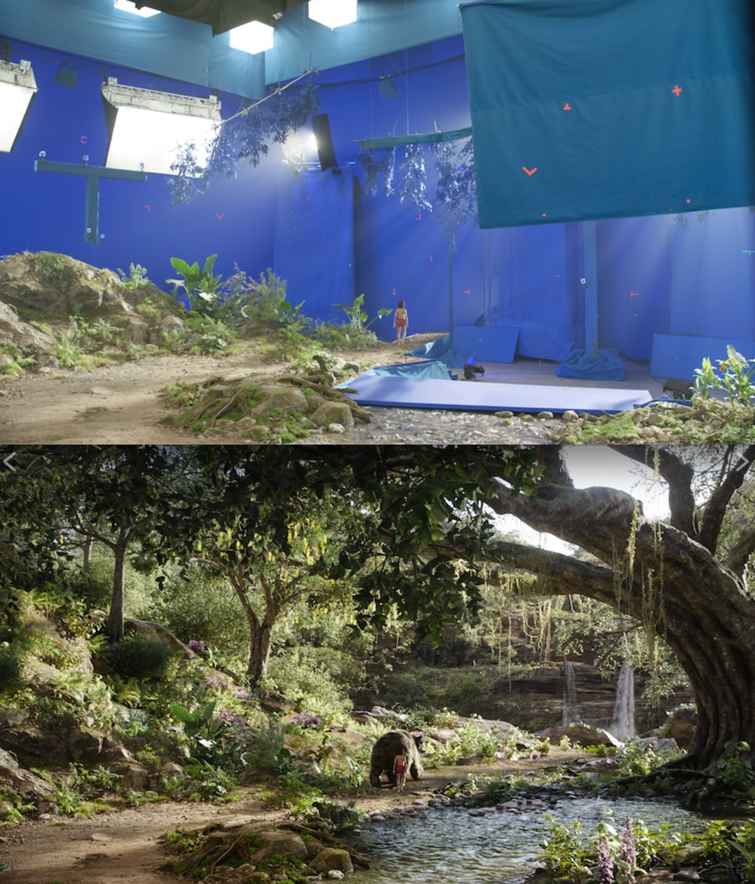
Green Screen
- According to the available space and nature of the shot, you can opt for either a portable or a permanent one. Some people even paint a wall green.
Because our shot will consider the actor without recording his feet, we’ll adopt a comfortable, portable green screen.
Also, we don’t want to move a lot in the shot, so this is a perfect choice.
KHOMO GEAR Collapsible Chromakey Panel.
Easy to mount—1 minute—and offers sufficient space for our shot.
This way, we can composite any images or videos and act in front of them
A Series of Tracking Markers
- The goal is to track the head movement by overlapping a 3D object with it. Sometimes we can follow an element without trackers, but a marker-based solution will be adopted to refine the tracking.
Generally speaking, there are many ways to create trackers. A cheap but robust solution uses simple skin markers which can be easily removed from your body.
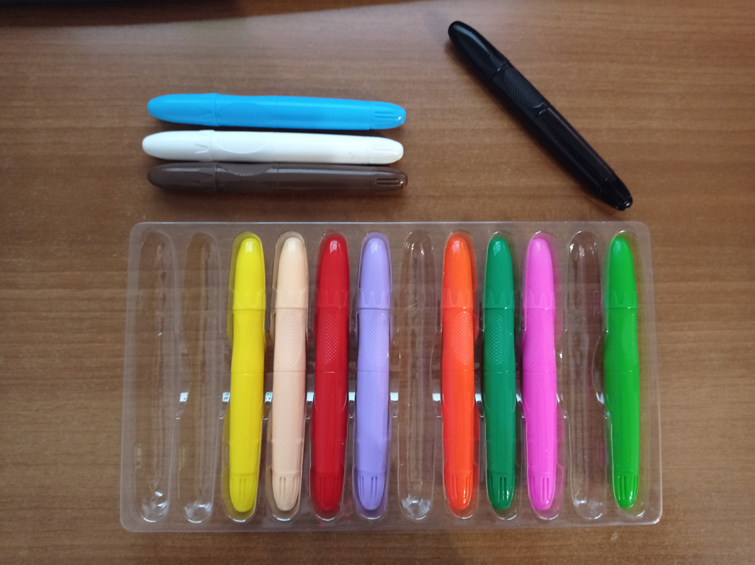
It’s better to create the right contrast on the skin to ease the tracking process. In our specific situation, we’ll be utilizing the black skin marker.
Two Softboxes
- They illuminate the green screen and the subject. Double usage is not mandatory at all! You might also decide to target the softboxes to the screen and use additional lamps for the subject. Apart from the lighting on the subject, the primary function of the softboxes is to illuminate the green screen as uniformly as possible. In fact, the more the uniform color, the easier to extract the background by the chroma key.
- In the most straightforward configuration, two lamps are sufficient if positioned one on the left and one on the right.
- As the word suggests, they produce soft shadows and they are suitable for portrait lighting in the studio. For more info, there is an issue talking about lighting schemes.
Soft lighting is produced by the presence of cloth in front of an incandescent lamp. Consequently, the scattered light creates that soft effect.
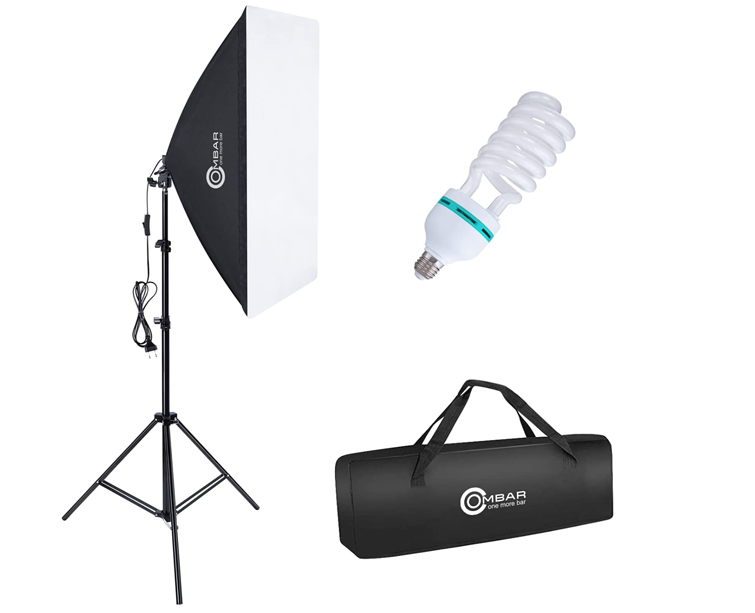
A pair of OMBAR Softboxes. 135 W, 5500 K.
A simple Tripod for your Camera
You must have the ability to set the height of your camera, depending on your shot. A tripod is what you need.
The following is a good choice.
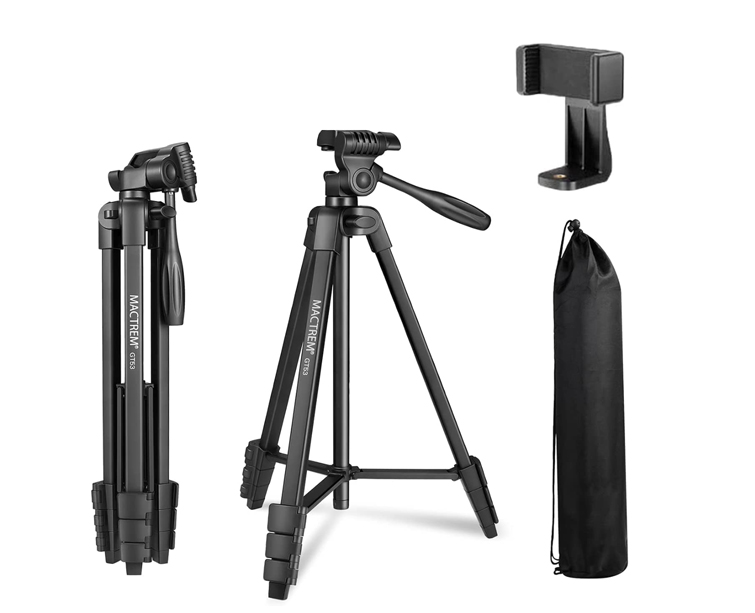
MACTREM Professional Camera Tripod.
Preparing our Shooting Location
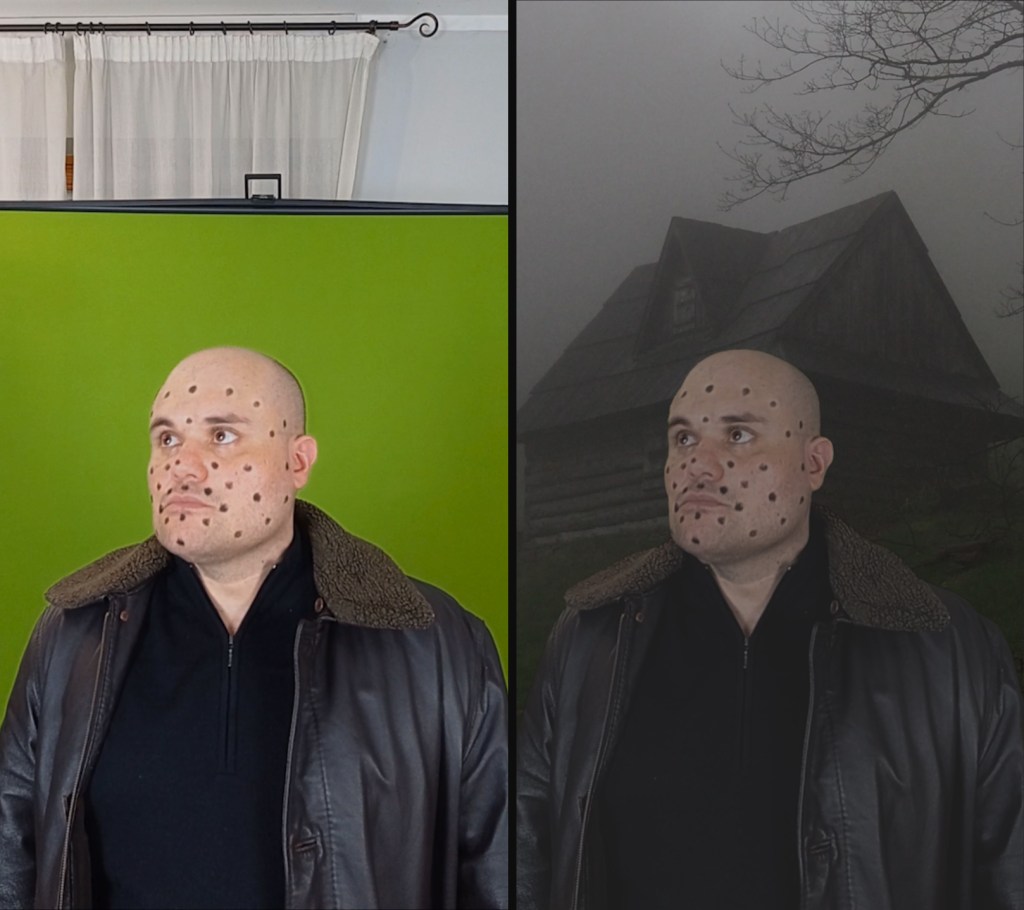
Our scene represents a short clip where I enter the frame, look around for a few seconds, and approach to exit. The shot doesn’t require a big stage, and you can easily replicate it at home, even if you don’t have enough space around you.
This is my shooting location.
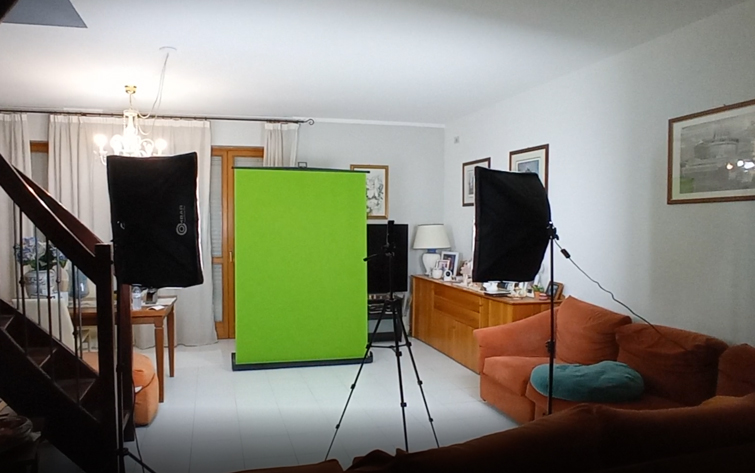
The lamps—one on the left and one on the right—uniformly illuminate the green screen by producing soft lighting.
Remember not to act too close to the green screen. In fact, you should avoid the presence of visible shadows on it. That will simplify the work in post-processing and make your shot look professional.
Once you are done with your setup, it’s time to introduce the markers on your face.

There is no strict rule about the position of your markers, as well as the number of them. That depends on what you want to track and where.
Honestly, I could have used much fewer markers since I’m not capturing the muscle deformation here, but the head movement. However, I wanted to have a bigger set of trackers to choose from and check which ones refine the result in the best way.
We’ll see the whole tracking process in a while. For the moment, let’s have a look at one shot from the green screen session.
I used an example background with a bit of color correction to test the chroma key quality. This is just an example, and we’ll apply a different background for our final shot.
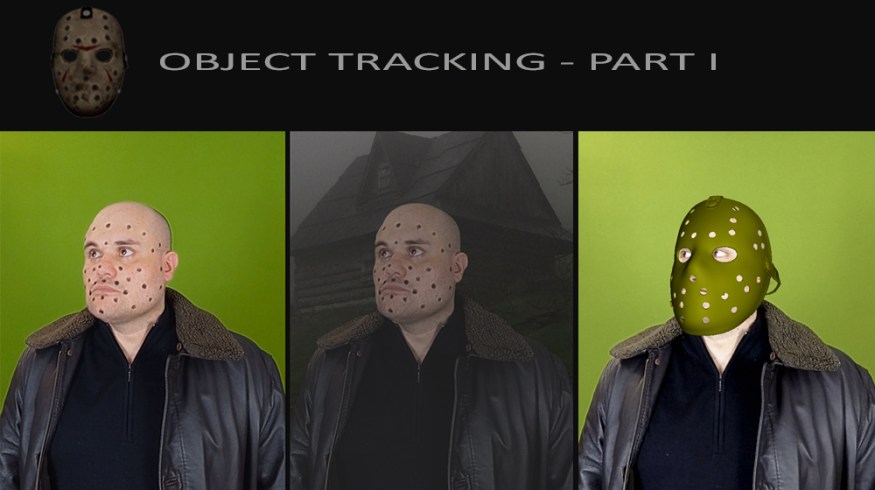
Object Tracking in Action
Here comes the fun part!
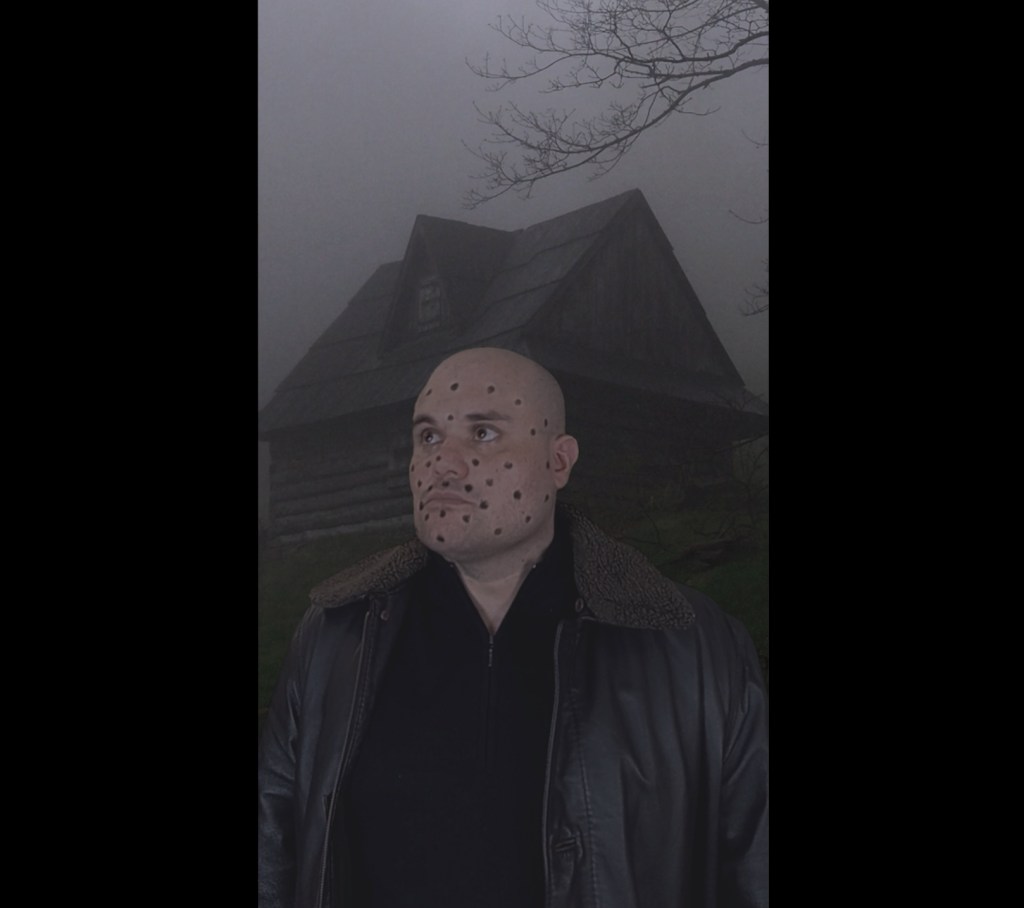
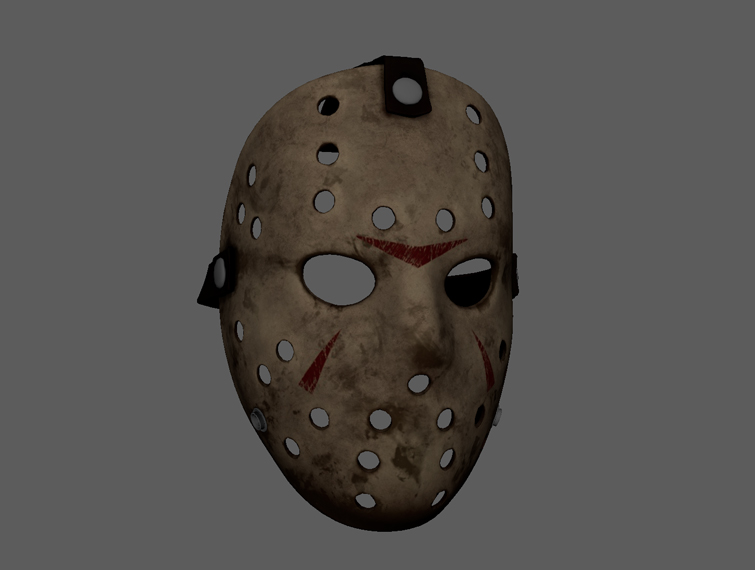
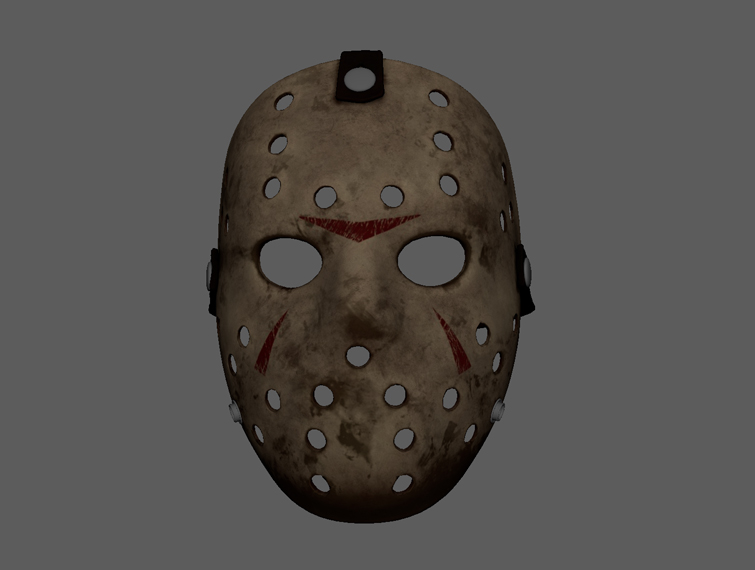
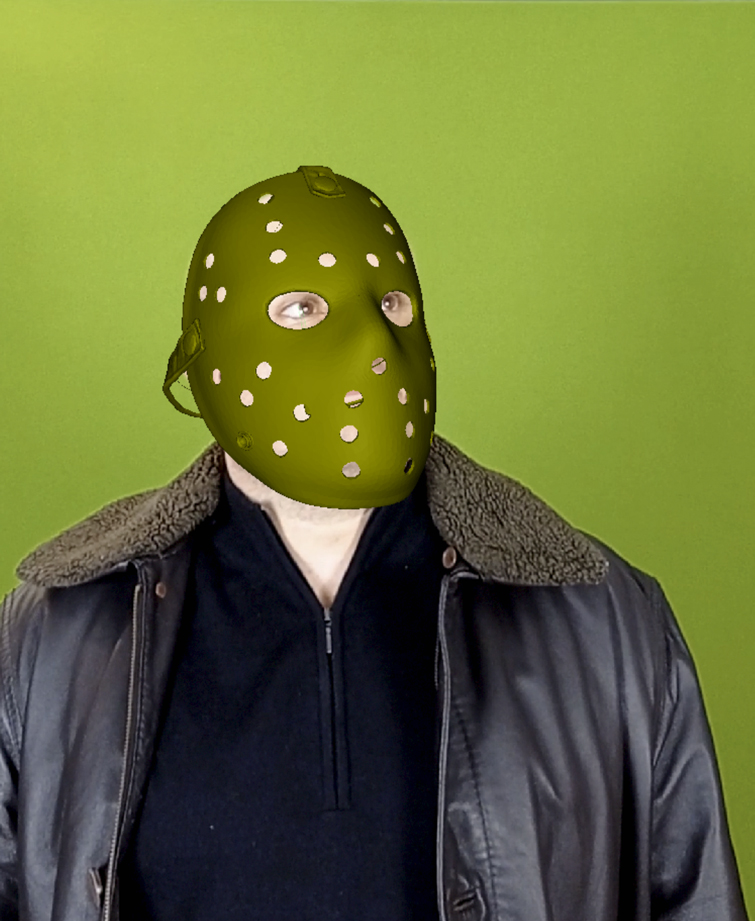
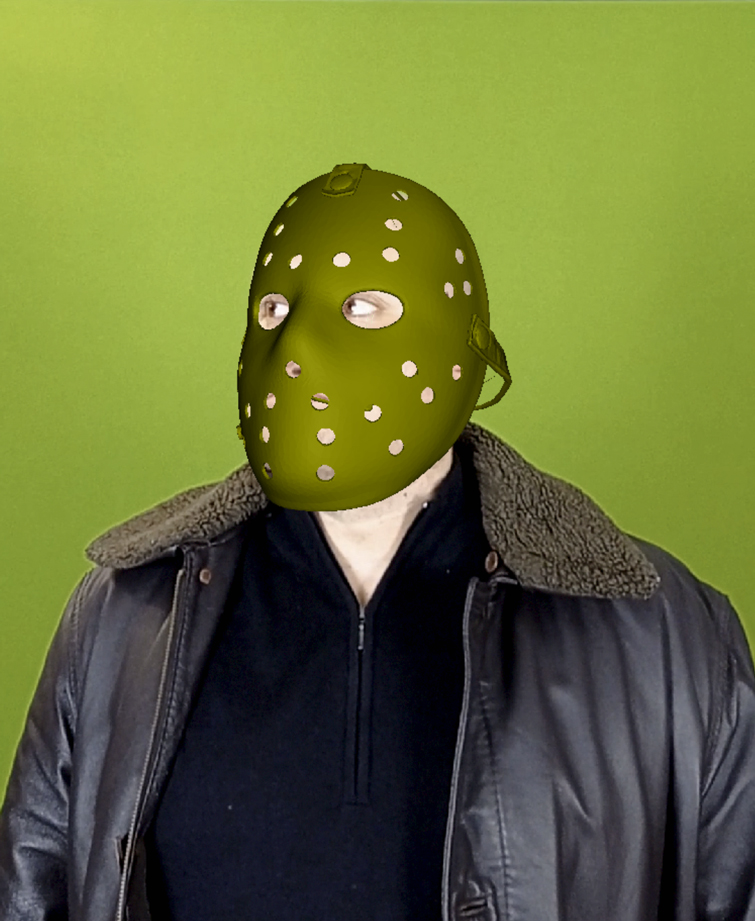
The shot itself is not that fancy, as long as we don’t add a 3D mesh to spice the scene up. For this purpose I decided to wear a mask throughout the clip. So, why not use a well-known mask from one of the most iconic horror movie villains of all time?
Oh yes! I’m talking about Jason Voorhees from Friday the 13th.
I used a 3D mask from the web, which has to follow my head movement.
This kind of task is called Object Tracking. Instead of recording how the real camera moves in a scene—aka camera tracking—we record the movement of a video element to overlap a 3D mesh.
Inside PFTrack
The PFTrack software is a feature-rich tool based on nodes, so we’ll use it for this project.
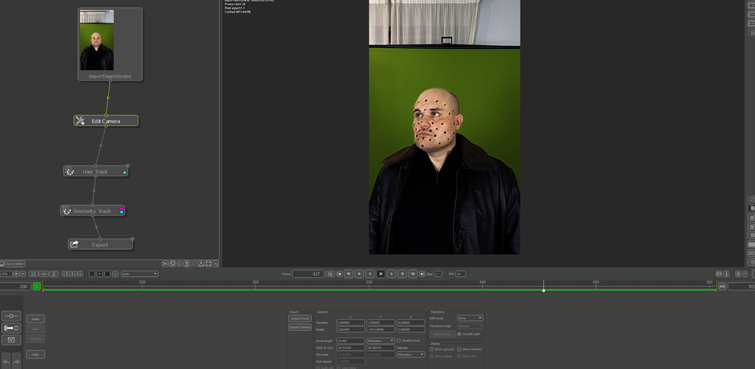
After importing the video sequence, we are ready to work on the shot. This is the primary interface with the series of used nodes.
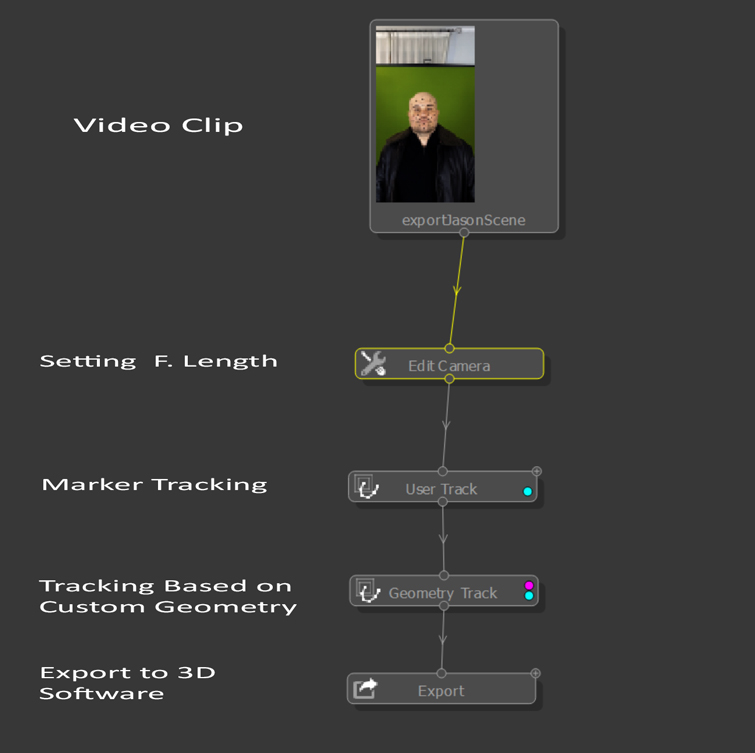
The Edit Camera node is extremely important here as it provides a fundamental hint to PFTrack. What we want to edit is the camera focal length. We manually enter that parameter which has to be as precise as possible. However, you might not know that value, especially if you don’t record the shot yourself.
In that case, the Estimate Focal node works as expected. It returns the proper camera focal length based on a few perspective indications—more info here.
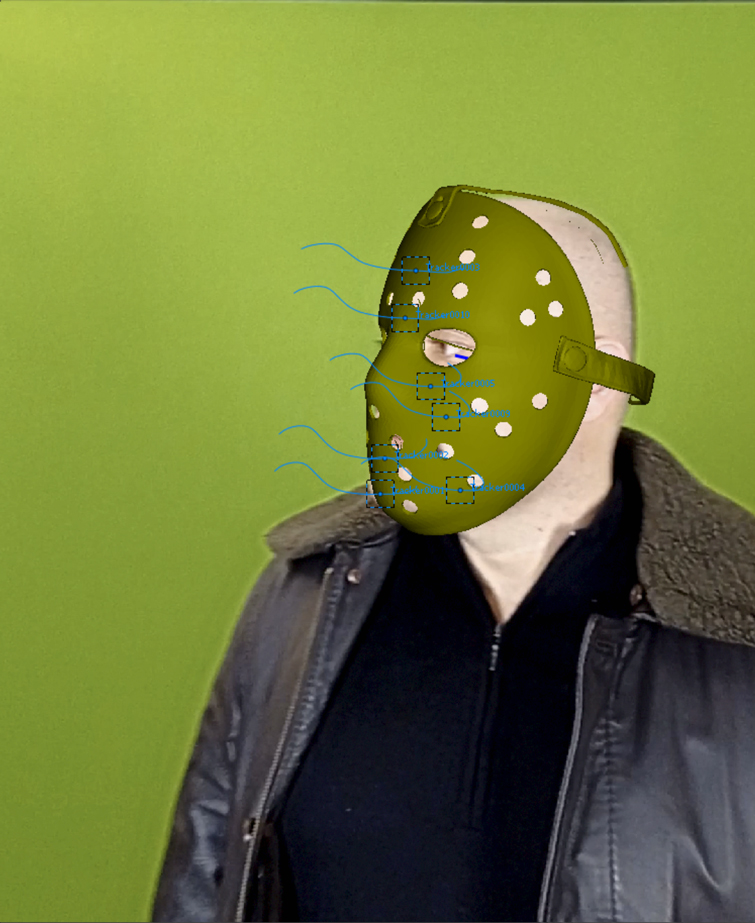
The User Track node allows me to pick custom markers on the face and record their movement during the whole shot. As mentioned earlier, we select a subset of markers.
By using the tracking commands, we can record the movement.
Those trackers will be used soon as helpers for the Geometry Track node. They are good at maintaining a particular perspective and help refine the orientation of the 3D mesh as the head moves.
A portion of the clip shows the user trackers, which follow some of the black markers.
The Geometry Track Node
The Geometry Track node is outstanding, as it can work even without tracking markers. It’s sufficient to match a 3D mesh to a moving object in the video—at a specific frame—and start tracking back and forth.
So, why did we use black markers on the face?
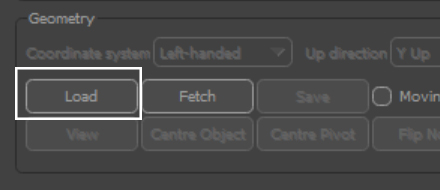
The Geometry Track node also accepts user trackers to improve and refine the result. To utilize this node, you have to:
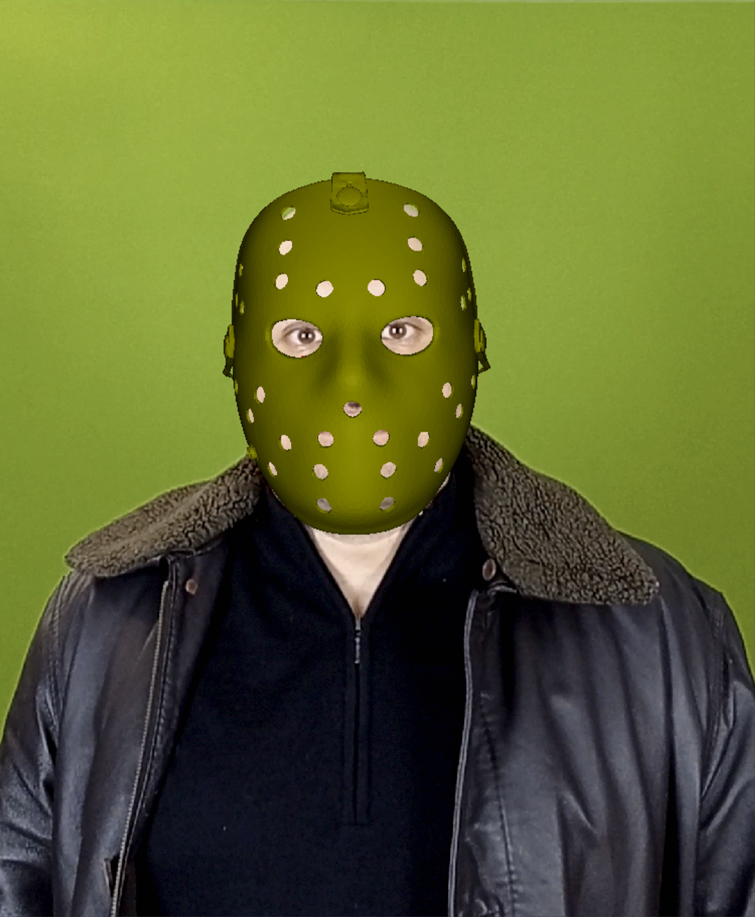
Load the 3D model—Jason’s mask—by clicking on the Load button of the Geometry Track node. Translate, rotate and scale the imported 3D mesh to match the face at a certain frame. It’s better to choose a frame where the head is oriented toward the camera.
At this point, use the arrows to track back and forth. The single arrows work frame by frame, while the double ones keep tracking for more frames.
If you notice that, for a frame, the tracking is a bit off, you can always re-orient the face on that frame, add a key, move to the next frame, and click on Refine button. The refine button should be applied to the previous frame as well.
That way, you create a smooth transition after you add a key.

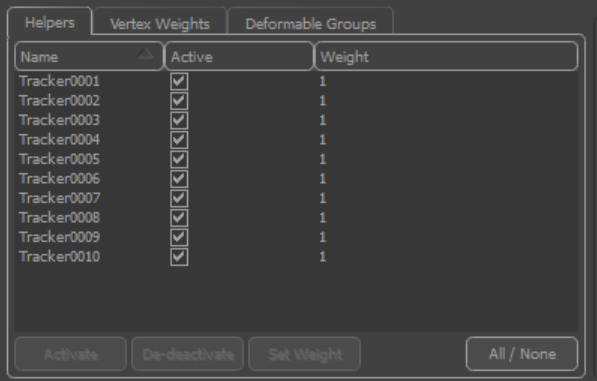
The previous user trackers can be added as helpers to the Geometry Track node.
That way your tracking will be much better.
At this stage don’t worry if the laces don’t match the head. They will be adjusted later on in Maya.
Here is the list of the previous trackers.
At this point, this is the result we obtained.
The Export Node
In the end, we have to export the mask animation from PFTrack to your favorite 3D software.
In my case, I exported for Maya but PFTrack offers different exporters like fbx, obj, and 3DS Max to name a few.
The Export node also allows you to select what to export from the scene. In our case, we only need the 3D mesh with the embedded animation and that’s included by default.
This is the conclusion of the first part of the series. We’ll keep on working on this shot until the end of the next episode.
In the meantime, I invite you to follow me on my Linkedin page.
For more on 3D, check out these articles: